Monthly Archive: June 2023

Weeknight Dinner – Juicy, herby split turkey breast

Split turkey breast is one of those items that, when I see it, I buy it. It is not always readily available , so I jump on it when I can. What is a split turkey breast, you ask.. Basically, the breast portion of a turkey is split into 2, typically sold bone-in and skin on. Most nights I am feeding only myself and my husband, John. To cook an entire turkey would be a bit of madness. But a 2.5 – 4 pound bone-in breast of turkey is perfect!

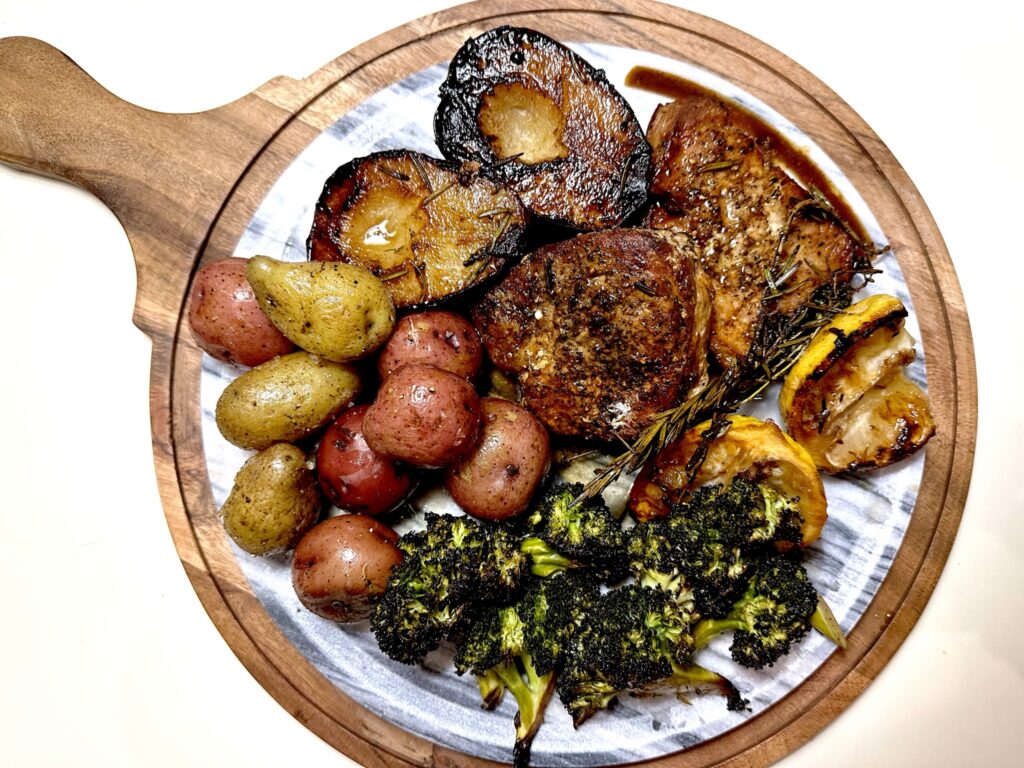
This recipe uses an herb spread that is put under the skin and very simple spices that form an amazing crust on the outer skin. Pair this with my go to vegetable tray bake for a delicious meal!

Ingredients

2.5 – 4 pound split turkey breast

3 Tbsp. butter

2 Tbsp. grapeseed or olive oil

2 Tbsp. chopped fresh parsley

2 Tbsp. dried rosemary divided

2 Tbsp. dried thyme divided

2 tsp. each kosher salt and coarse back pepper divided

Instruction

Preheat oven to 350 F.

Pat split turkey breast dry on all sides. Loosen skin, ensuring to not completely remove it. Mix the oil, butter, fresh parsley and 1 Tbsp. each of the rosemary and thyme, until fully combined. Rub under the skin, making sure to pull the skin fully back over the breast.

Mix remaining rosemary, thyme, salt and pepper. Sprinkle over the breast, as well as on backside bone. If you run short of spice to coat completely, simply add a bit more salt and pepper.

Roast on middle rack for 20 mins per pound. Begin checking the temp at thickest part of the breast at 40 mins. When temp reached 160 degrees, remove turkey from oven to cutting board and allow to rest 15-20 mins. You should have a beautifully browned skin on the outside and amazingly moist meat on the inside. Delicious!

Carve and enjoy!

Vegetable tray bake

There are some recipes that are so flexible and easy, that I go back to them quite consistently. This recipe is exactly that. A mixed tray of vegetables that are oven roasted with oil and spices. Because you can use just about any hearty vegetable for this recipe, it is a great “use what you have on hand” type of recipe

This vegetable recipe requires only a few turns with a spatula while cooking, so you are free to prepare other dishes while they are doing their thing. Although simple, there are a few key tips that take this simple side dish from good to great

Tips

For this specific recipe, I recommend heartier vegetables. Root vegetables are great options, as well as cauliflower, broccoli, brussels, or any winter squash

In order to allow all of the veg to cook roughly evenly, you will want to cut heartier veg to a smaller size and leave those, such as broccoli, a little bit bigger. This is not one to sweat though, any of the above mentioned veggies will be slightly more or less roasted and it is all good in the end

Occasionally toss in something that you would not usually think of roasting, such as red radish, daikon radish, celery root, jicama, or parsnip. Even some hearty fruits can be amazing. Think bosc pears or honeycrisp apples

Slice a garlic bulb in half, leaving a flat surface to place face down in roasting pan. When vegetables are done, garlic will be super soft and squeezable and can be served separately and added by each eater at your table as they desire

Instruction

Chop roughly 2 lbs. of varied vegetables. This should just fit into a standard baking tray. The more colorful, the better. This can really have wow factor on a platter on your table! Wash and dry as well as you can. This is where a salad spinner comes in handy.

Toss on tray with 1/4-1/2 cup of grapeseed or vegetable oil. Use just as much as needed to have a glossy coating over all veg. Sprinkle with kosher salt, pepper and rosemary. Add a few dashes of red wine vinegar and put into a preheated 400 F oven. Begin turning the veg occasionally once they have been in for 15 mins. They should be roasted nicely, with nice browning in 40 mins, but do a fork through the veg check each time you turn them.

Taste and add additional salt and pepper, to taste, as well as a drizzle over of extra virgin olive oil. Voila!

Note: I always make more vegetables than my husband and I can use in one sitting. I reheat in a sauté pan, or put under the broiler for a few mins to bring them back to life! Also, there are many alternatives, such as swapping out rosemary and thyme for togarashi or garam masala spice. Using a drizzle of lemon, rather than red wine vinegar. Have some fun with it!

Weeknight dinner – charred Chinese sausage

Some nights I am content to spend a couple hours in the kitchen, challenging myself with new recipes or ingredients. Other nights, I want something interesting, but simple. This is that kind of a meal. Chinese sausages are charred in the oven and served with soba noodles and a crisp salad. These sausages were not something that I typically buy. I have seen a number of cooking shows making use of them, so when I came across them in the grocery, I decided to give them a go and create an easy charred Chinese sausage meal.

Ingredients

5 Store bought Chinese sausages, such as these pork sausages found at the local Hannaford. I am guessing there are many brands of varied qualities out there, but this is what was at hand

2.5 – 3 ounce of Soba noodles, such as these, found in our local Hannaford

Mixed green salad of your choice. Do include radishes in your salad! The crisp and spicy kick they give, goes incredibly well with the sweet sausage

2 scallions, chopped – green and whites

For the dressing:

6 Tbsp. grapeseed oil (or olive, if you prefer)

3 Tbsp. rice vinegar

1 Tbsp. honey (substitute in sugar, if no honey on hand)

1 Tbsp. mirin

3 Tsp. low sodium soy sauce

Instruction

The glory of this recipe is the simplicity and how quickly it comes together. Heat oven to 350 F. Put sausages in greased oven safe pan (preferably cast iron) and put into oven. After 15-20 mins, turn sausages. They should be charring nicely, with a crisp outer skin. Bake another 15-20 mins until cooked through (160 F for internal temp). Cooking sausage in the oven was a revelation for me some years ago. I love the charred exterior that you get, as well as the fact that the cook top evades the typical splatter factor!

While the sausages are cooking away, follow instructions on Soba package. Drain and set aside noodles. Assemble salad. Plate both salad and noodles. Put all dressing ingredients in a jar and shake vigorously. Taste and adjust to your liking. I prefer a little less vinegar and a bit salty sweet, but tinker until it is perfect for your taste. Dress the noodles and salad and add sausages over the noodles.

Why I loved this recipe

I knew to expect these Chinese sausages to be on the sweet side. The sweetness paired perfectly with the crunch of the salad and the punch of the Asian dressing. It literally hit all notes…sweet, salty, spicy, sour! The soba adds that last perfect bit of nutty, earthy flavor.

This recipe could be tweaked to use crunchy cabbage and carrots for a slaw, rather than salad, or Udon, rice or other noodles to mix it up. So many options! This one will be on my easy weeknight meal repertoire from here on out!

If you like this recipe, you might also like my recipe for Asian inspired veggie salad feast with pork