Monthly Archive: August 2023

Blueberry Zucchini Bread and Muffins

If you are like me, this is the time of year when you are grateful for the bounty of summer squash and zucchini in your garden, but also wondering, “why did I plant so much?” and “what to do with all of this veg?”. Every year I make grilled squash, baked squash with cheese of some sort, thinly sliced squash ribbons for salads, and of course, some sort of zucchini bread in an attempt to ensure nothing goes to waste. This year, the bounty is as crazy as usual, so I tackled one of the recipes that uses a good amount of veg and turns out great results, zucchini bread. However, I added in blueberries this year, making an absolutely amazing blueberry zucchini bread! This bread was incredibly moist. AND there was enough batter to make a standard sized bread, as well as 6 bonus muffins!

I will cut to the chase and get to the recipe, because I am challenging myself to also construct a new recipe for potato/zucchini latkes! That one is coming at you in the near future!

Ingredients

  • 1 1/4 cup white sugar

  • .5 cup dark brown sugar

  • 1 cup veggie oil

  • 3 teaspoons pure vanilla extract

  • 4 small – medium eggs

  • 2 – 2 1/4 cups shredded zucchini (no need to wring out or drain)

  • 3 cups AP flour

  • 1 Tbsp fresh ground cinnamon (if possible). If store bought, up amount to 1 1/2 Tbsp

  • 1 healthy pinch of ground clove

  • 1 teaspoon fine sea salt

  • 1 teaspoon baking powder

  • 1/4 teaspoon baking soda

  • 1 pint fresh blueberries

Instruction for Blueberry Zucchini Bread

  • Preheat oven to 350 degrees F. Using vegetable oil and paper towels, grease a 6 muffin tin and a standard loaf pan generously
  • Beat the oil, eggs and vanilla in a large bowl
  • Fold in zucchini
  • Add in cinnamon, clove, baking powder and baking soda. Lightly whisk together
  • Add in sugar and whisk only until combined
  • Toss blueberries in a tablespoon of flour, just to coat and then fold into the batter gently
  • Pour into muffin tin, careful to not overfill. Stay about 1/4 inch below the top of each muffin mold
  • Pour remaining batter into the loaf pan. Sprinkle with a little sugar (optional). Put the muffin pan on the bottom rack and loaf pan on middle to upper rack
  • Muffins should be ready in 45 mins. Begin checking at about 40 mins. Test by inserting a knife into center. When it comes out clean, muffins are ready to go!
  • Loaf should take about 15-20 mins more than muffins. Begin testing once the muffins are out of the oven and claim done once knife comes out clean
  • For both the muffins and loaf, let cool 15 mins in pan and then move out of pans to cooling rack.

Note: Cooling completely will allow for a nice, clean cut on the zucchini bread, but if you want to eat it hot, I say, go for it!! It may look a bit messy, but with a dollop of butter on top when still hot…YUM! Also, expect the muffins to be a bit more dense, but the bread to be extremely moist. If you are aiming to impress, serve or gift the bread to guests and keep the muffins for yourself, perfect for eating with your coffee!

If you like this recipe. try my strawberry muffin recipe! Both aim to impress and use in-season fruit!

Savory Turkey Tenderloin

There is nothing better than when you nail down a good turkey recipe. I love being able to add another poultry option into my diet, but turkey can be a hard nut to crack. It is incredibly easy to overcook, resulting in dry meat. It is also quite an undertaking to cook a whole turkey, particularly if you are not cooking for a crowd. This recipe for turkey tenderloin addresses all of that! With tenderloin being just a cut of the turkey, it cooks quickly and can be scaled up or down in terms of amount cooked to suit your family.

I simply LOVE this recipe! What really makes this savory turkey tenderloin recipe special is the marinade. Turkey, by nature, can be lacking in full flavor. The addition of a savory but slightly sweet marinade does the trick. So, let’s get to it!

For the marinade

  • 1/4 cup low sodium soy sauce
  • 1/4 cup vegetable or grapeseed oil
  • 1/2 – 2 tsp cayenne pepper (go with your taste here)
  • 1 Tbsp dark brown sugar (or runny honey, if you prefer)
  • 1 Tbsp dried rosemary
  • 1 stalk of fresh rosemary, sprigs removed from stalk

Mix all marinade ingredients in small bowl. Transfer to a selable bag when ready to marinate.

For the turkey tenderloin

  • 1.5 pounds of turkey tenderloin. This will typically be 2 tenderloin pieces, sold in one package. Aim to go with 2 loins that are roughly the same size for even cooking
  • 1 Tbsp vegetable or grapeseed oil for browning

Instruction

Insert the turkey tenderloin into the marinade bag. Allow to marinate in the refrigerator for 2-24 hours

Preheat oven to 350 degrees (use convection mode, if you have it)

Remove tenderloin from marinade and shake off any excess

Heat a cast iron, or heavy, oven safe skillet on med-high heat. Add oil and when shimmering and brown the top and bottom of the tenderloin

Place pan in oven and allow to roast until internal temp at thickest part of tenderloin is 160 degree F. This should be roughly 20-30 mins. Remove from oven and move to a cutting board to rest

Once rested, slice and enjoy!!

Serving the turkey tenderloin

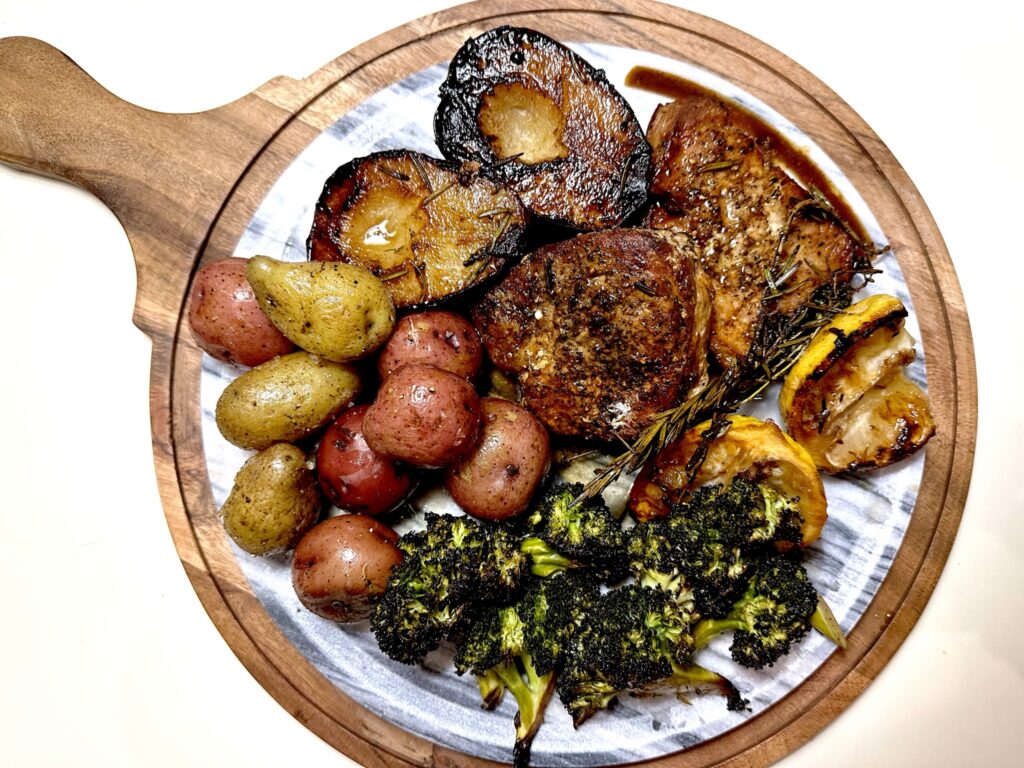
Turkey goes with just about any vegetable. You can take a Thanksgiving day approach with mashed, cranberry sauce and stuffing, or something more simple. This week I served it with my oven roasted corn on the cob and some lemon parmesan roasted broccoli. Yum!

Broccoli, garlic and lemons are roasted at 350 until tender. Add a sprinkling of parmesan cheese and roast 5 mins more

If you like this recipe, you might also like my recipe for juicy, herby split turkey breast!

Tasty Taco Salad

My husband and I are both taco lovers. Taco Tuesday is a regular weekly staple in our lives. He is a flour soft taco guy and I am a hard, corn tortilla kinda gal most of the time. This tasty taco salad is one version of a taco that we both agree on and enjoy each and every time it is ordered or made at home.

Like most recipes I like to cook, there is no set way that it has to be made. Ingredients can be substituted, flavors swapped, and type of protein updated. I have a recipe for Asian inspired veggie salad feast, that has many of the same elements of a taco salad, but with different flavors and selection of veggies. Small changes allow me to keep staple recipes simple, but add variety in both nutrition and flavor.

Ingredients for Taco Salad

  • Seasoned Beef
  • 1 lb. ground beef – 80-85% lean (fear not, beef will be drained before adding spice)

  • 2 Heap Tbsp Taco seasoning (see recipe below)

  • 2 tsp. graeseed or vegetable oil

  • Veggies
  • 4-6 oz – crunchy greens, such as Lef Farms Crispy Green Lettuce, mixed with any lettuce variety.

  • 1 hot chili, such as jalapeno or serrano

  • 1/2 cucumber, seeded and sliced

  • 1/2 heirloom tomato chopped into bite size chuncks

  • 7 oz. canned corn, drained

  • 7 oz. canned black beans drained

  • 1 lime quartered for dressing individual plates

  • Cheddar, cotija or other cheese of your choice for sprinkling (1-1 1/2 ounce)

Taco Seasoning recipe

Note: this recipe will make enough seasoning for a number of uses.

  • 1 heap Tbsp. Chili Powder
  • 1 tsp. fine sea salt
  • 1 tsp. kosher salt
  • 1 tsp. sweet paprila
  • 1.5 tsp. black pepper
  • 2 tsp. garlic powder
  • 2 tsp. ground cumin
  • 1 tsp. onion powder
  • 1/2-1 tsp. red pepper flakes (optional – remove if you do not want the heat)
  • 1-2 tsp. dried oregano

Add all ingredients in a jar and shake to mix. Store in dry location until use.

Instruction

Heat large frying pan to medium-high heat. Add oil. When oil is shimmering, add in beef and begin breaking apart as it cooks. When beef is just browned and broken down, carefully drain any excessive oil in pan. You do not want your taco salad to be too greasy!

Add in the taco seasoning and combine. Cook until beef is just getting crispy. Put aside to cool a bit.

While the beef is cooking, wash and dry lettuce, slice and dice other veg, and arrange all vegetables on serving plate.

Add beef to middlle of plate and sprinkle some of the cheese over.

Put remaining cheese to the side for individual sprinkling.

Serving the Tasty Taco Salad

Serve family style, with cheese and lime wedges available for individual plates.

Servings: 4-6

Famliy style taco salad
Tasty taco salad served family style

If you like this recipe, take a look at my burger with baked french fries and all the fixins recipe!

Spatchcock Chicken grilled with Summer Fruit

I am on a grilled, roasted or just straight up stone fruit kick. These fruits (peaches, pluots, plums, nectarines, apricots and cherries) are up there in my book. I do prefer some of them cooked (cherries), while others are good just about any which way I can get them! This recipe for spatchcock chicken grilled with summer fruit really hit the spot in our house. Served with quinoa dressed in olive oil, lemon and simple salt and pepper, all aspects of a good meal are covered!

Note: if you also love cooked cherries, check out this recipe for cherry bourbon pork chops!

One of the best aspects of spatchcocking a chicken, is that it cooks quickly any which way you decide to cook it. Having been a beautiful day, I decided to use the gas grill this past week and the results were super!

Preparing the chicken

What is a spatchcocked chicken? It is a chicken that is butterflied. The backbone is typically removed and then the chicken is laid flat with the inside of the chicken on your cutting board, allowing for the breast to be pressed. It results in a flat bird that will cook evenly and quickly. Martha Stweart has a great account of all of the details on her website that is super helpful. Check it out if this is a new technique for you.

If you are leery of cutting the backbone and ribs out of the chicken, it is much more common these days to find them already spatchcocked in your store. Or, ask your butcher to do the job for you. Bell and Evans has pre-cut and flattended versions selling in many stores.

Once your chicken is ready to go, dry the chicken completely and season very liberally on both sides with the seasoning of your choice. My chicken/pork rub below is tried and true, if you want to give it try!

Quick Chicken/Pork Rub Recipe

1 Tbsp. each of Garlic Powder, Onion Powder, Sweet Paprika, Brown Sugar

1 Tsp, each of cinnamon, pepper (fresh ground preferably) and salt

This is enough for roughly a 4 lb. chicken. Double, triple or quadruple the recipe to keep some in the cabinet for other recipes. I use this both for pork and chicken, so it does not go to waste!

Ingredients for this complete dinner

A 3-4 pound chicken

Spice rub (roughly 3-5 full Tbsp)

2-3 stone fruits of your choice. You can halve them for grilling direct on the grill grate, or slice them and use a cast iron pan on the grill. See pics below.

Olive oil, salt and pepper, for coating the grill and the pan. As well for drizzlling/sprinkling over the chicken and fruits

Optional: 4 servings of cooked quinoa, wild rice, freekah or farro. Basically, any grain with a good amount of texture to offset the tender, juicy chicken and sweet, soft delicious fruits! Also, a lemon to be grilled to yummy sweetness and used to squeeze over the grains with some seasoning and EVOO.

Grilling instructions

Get grill heated to medium, with an area that is less hot, in case you need to move off the heat due to flare ups etc. Ensure you have oiled the grates. Oil and season the fruits and place into the cast iron pan and then onto the grill. If using halved fruits, place onto grill grates directly. Continue to check doneness. If knife goes through and there is great browning or grill marks, you are good to go.

Once fruit is on, place chicken breast side up and allow to cook for 30-45 mins, until inner temp is roughly 155 degrees F in thigh. 10-20 mins more cooking time.

Drizzle oil on breast side, use basting brush to rub all over breast, legs and wings. Turn over and allow breast to brown to a nice crispy finish! Inner temp in thigh should now be 160-165. Remove and set aside to cool for 20 mins.

Serve with one of the optional mentioned grains and ENJOY! Let me know how your chicken turns out.

If you have a few more stone fruits hanging out in your fruit bowl, give this stone fruit salad a try!

Homemade scratch pancakes

Growing up, I was a challenging kid to feed. It took me until my twenties to decide that there was a lot of value in trying a variety of vegetables….or much else, for that matter. No sauces, no greens, picky about meats…all of it! My sisters and mom did what they could, and I can say that there were a lot of bowls of cereal and stacks of pancakes in my life! hahaha. However, I cannot remember if there was any homemade scratch pancakes or not! 😉

So, you would think that some of these childhood staples would be the last thing I would ever want to go to now, but pancakes, are still a, now and then, indulgence in my life. I have found that homemade scratch pancakes are even better than those out of the box and are not that much more of an effort. Most ingredients are in the cabinet and you can take them straight up, or add any fruit of your choice. As a matter of fact, no one should judge if one were to do pancakes for lunch or dinner every now and again!

I will warn that this recipes turned out about 16 or so pancakes, so throttle it up or down in size based on the group you are feeding. However, I now have about 8-10 of them wrapped in 2s in parchment paper, frozen in freezer bags and they freeze amazingly. They cook directly from frozen in the toaster when you want that extra treat with your coffee or tea!

Also, this recipe uses cake flour. I had purchased King Arthur cake flour to make my almond angel food cake. It has a lower amount of protein than all purpose flour, which amount to fluffier, lighter consistency. With this flour on hand, I was very curious what else I could do that would benefit from using it! This is how I arrived at homemaade scratch pancakes. If you do not have cake flour on hand, go ahead with the all purpose…very few pancakes are not edible, as far as I am concerned!

Ingredients

  • 2 2/3 cups cake flour
  • 1 tsp table salt
  • 2 Tbsp baking powder
  • 1/3 cup granulated sugar
  • 2 large eggs
  • 2 1/2 cups whole or 2% milk
  • 6 Tbsp canola or vegetable oil
  • 1 tsp pure vanilla extract
  • Butter (to cook with and to top finished cakes)

Instruction

  1. Mix all dry ingredients together in a bowl, using a whisk to fully combine
  2. In a large bowl, mix eggs, oil, milk, and vanilla
  3. Slowly add the dry ingredients into the large bowl of wet ingredients, whisking to combine. Do not overwork. Simply whisk until smooth. The batter will be a bit on the thin side. If you prefer thicker cakes, add just a bit more flour and combine
  4. Heat a large skillet or griddle. Be sure you have medium to high heat that will quickly cook the first side to golden brown before turning to brown the 2nd side. Keep a stick of butter at the ready and add in a pat and allow to melt out before pouring each batch of batter. Add 1 pancake to start and test to ensure your heat is high enough, but not burning the pancakes. When tester is perfect, Rock n Roll!!
  5. Continue to add only as much butter as needed to coat the pan and provide the yummy browning. I used a 1/3 cup measuring cup and filled it about 3/4 to arrive at the perfect size pancake
First 2 pancakes. Not perfect, but darn yummy! They only got better, in terms of even browning from there…

Pancakes can be doled out as you go, or lightly cover with foil and sit in a 250 degree oven until all are ready to go.

Adding the extras!

What does not go with a pancake? If you prefer to add ingredients into the batter, all the usuals are on the table. Strawberry, apple, berries of all kind, chocolate chips, butterscotch chips. So many options. But, for this recipe, where the work was put in to make them from scratch, I went straight up NH Maple Syrup and a tab of butter on each cake. Simple and delicious!

If you like this recipe, try my recipe for almond angel cake. It is a perfect slice of heaven to have with a cup of coffee or tea!

Stone Fruit Salad

There is nothing better during the summer than the in-season fruits. I am a sucker for stone fruits. Peaches, nectarines, plums, pluots…I love them all. Typically, I love these fruits because they can be grilled and add that pop of sweetness that goes amazing with pork or chicken. Heck, I will pair them with just about anything. However, this stone fruit salad is not grilled, making it a fast and easy dish for any outing or BBQ you attend!

The truth of the matter is that you could grill the fruits for this dish, I simply did not have the time on the day that I made it. I would definitely caution that in order to grill, the fruit will need to be a little bit les on the ripe side in order to be able to layer it on the plate.

Quick and easy ingredients!

  • 1-2 ripe, but solid nectarines as well as white or yellow peaches (really, any stone fruit with enough size to cut and arrange will do)
  • 1 ball of fresh mozzarella (8 ounce)
  • 1 bunch of fresh basil
  • Flaky sea salt and freshly grouond black pepper

Slicing and arranging

Slice the peaches and nectarines into half moon shape, once you have removed the stone from the fruit. By the way, if you have not researched how to remove the stone from a stone fruit (guessing most have not!), I found this super helpful video that makes this task as simple as it could be!

Slice the mozzarella into similarly sized slices

Once all is sliced. arrange on round plate, layering in the mozz and fruit, in a pattern appealing to your eye! Dot washed basil over the salad as well. Hit it with the flaky sea salt and pepper. Voila! Stone fruit salad!

Optional flourishes – 2 tsp fresh lemon juice, extra virgin olive oil, balsamic glaze, pomegranate molasses. Note: if you are preparing ahead of time, do not add the liquid options until serving and ensure you can refrigerate once served. A spray of lemon will also help with any browning if not consuming right away!

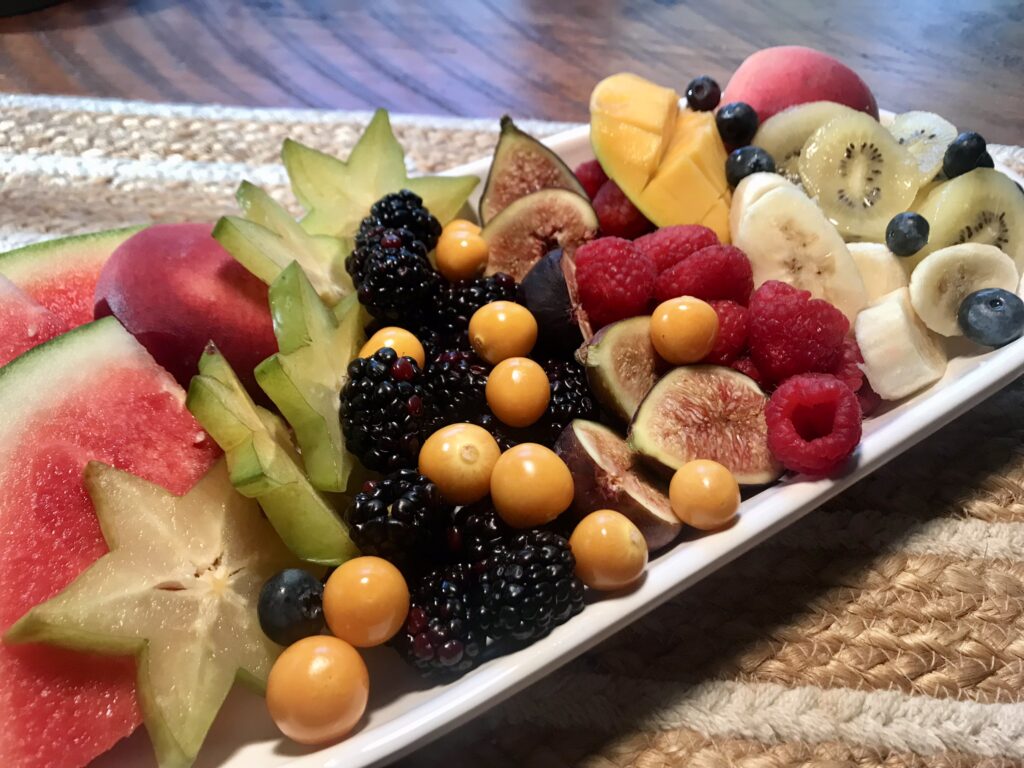
If you like this recipe. you may also like my suggestion for serving an amazing fruit plate. Let them eat fruit!